Niet lang nadat ik dit paarse vestje had gekocht, voelde ik al dat het niet de droomaankoop was 'waar je jaren plezier van hebt'. Het model stond me niet, ik kreeg er toch een ouwelijk gevoel bij. Dit vestje verdiende een verjongingskuur, en dat is hopelijk met de jeans details gelukt!
Helaas heb ik wat last van mijn rug en schouders waardoor ik niet te lang achter de computer wil zitten. Ik probeer het dit keer wat korter te houden en de beelden meer voor zichzelf spreken.
Nog long after I'd purchased this cardigan I knew it wasn't the cardigan I would enjoy for years to come. It didn't suit me, it made me look a bit older (and that's never a good sign). I felt it deserved a rejuvenation, which I hope succeeded by adding details in jeans.
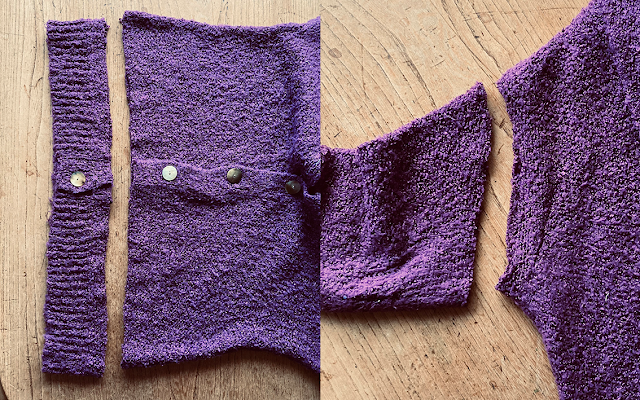
Ik begon met het korter maken van het vestje, zodat het wat vlotter zou vallen. Ook de mouwen gingen eraf.
First, I cut off the sleeves and bottom ribbing.
 |
| Sorry, you're making it too old, you have to go... |
Als vervanging van de boord maakte ik een jeans band van 3cm x de wijdte van het vestje. Er was helaas niet genoegd stof om het schuin te knippen, dat had wel een paar nadelen, zie verderop.
 |
I cut a jeans strip (3cm x the width) to finish the front and back with a jeans band. There wasn't enough fabric to cut it on the bias, so I had to make some adjustments later on... And for a playful effect, I finished the band with an oblique/bevel (?) corner.
 |
| Hoping for some gathering with elastic thread |
Unfortunately the added jeans band didn't work that wel at first. It stood out, the fabric was much heavier than the knit and it didn't help that there was absolutely no stretch in the jeans. I tried to solve it by sewing along the edge with elastic thread wound up on the bobbin. That was already an improvement!
Als volgende ging ik aan de slag met de afwerking van de armsgaten. De bandjes daarvan kon ik wel schuin knippen, daardoor ontstond er meer rek in de stof, wat goed werkte bij het gebreide vestje.

I cut the strip for the armholes on the bias, big difference!
Dan nog de puntjes op de i met jeans knopen. Ik vond die parelmoeren knoopjes een beetje sowieso tuttig. Stoffen knopen maken is trouwens een uitstekende manier om van lelijke knopen af te komen:). Met naald en draad langs de rand van de cirkel trok ik de randen van de stof bijeen. Om het definitief vast te zetten, gebruikte ik wat textiellijm.
Unfortunately the added jeans band didn't work that wel at first. It stood out, the fabric was much heavier than the knit and it didn't help that there was absolutely no stretch in the jeans. I tried to solve it by sewing along the edge with elastic thread wound up on the bobbin. That was already an improvement!
Als volgende ging ik aan de slag met de afwerking van de armsgaten. De bandjes daarvan kon ik wel schuin knippen, daardoor ontstond er meer rek in de stof, wat goed werkte bij het gebreide vestje.
 |
| I cut the strip for the armholes on the bias, big difference! |
Dan nog de puntjes op de i met jeans knopen. Ik vond die parelmoeren knoopjes een beetje sowieso tuttig. Stoffen knopen maken is trouwens een uitstekende manier om van lelijke knopen af te komen:). Met naald en draad langs de rand van de cirkel trok ik de randen van de stof bijeen. Om het definitief vast te zetten, gebruikte ik wat textiellijm.
 |
| Jeans buttons for the finishing touch! |
I gathered the edge of the fabric and then pulled the fabric together. I added some textile to make sure it would stay put.
In the end I still wasn't quite satisfied with the jeans band at the bottom so I opened a seam and pulled some elastic through the tunnel for some extra gathering.
 |
| de details |


Reacties
Een reactie posten